
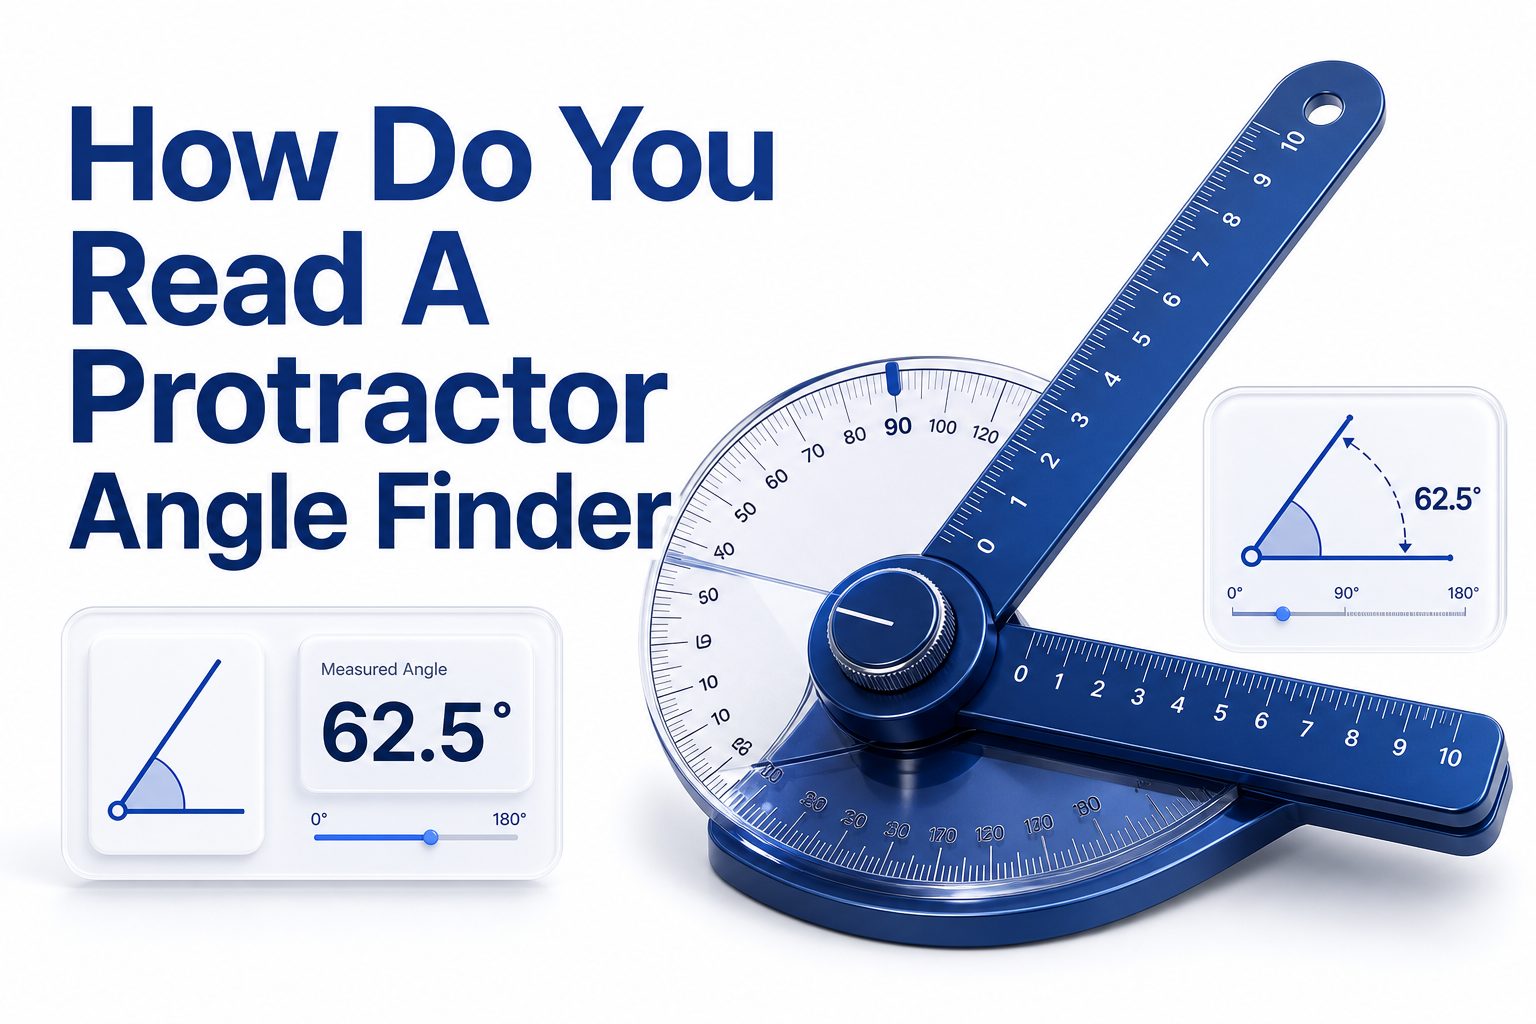
A protractor angle finder measures the angle between two surfaces, edges, or lines. To read it correctly, place the base against one side, align the moving arm with the other side, then check where the pointer or scale shows the angle.
The phrase how do you read a protractor angle finder often comes up when people are working with trim, woodworking cuts, metal layout, school geometry, or home repair. The tool looks simple, but small placement errors can change the reading.
A clean reading depends on steady contact, clear scale visibility, and knowing whether the tool shows inside, outside, or supplementary angles. Once those basics are clear, the angle finder becomes one of the most reliable measuring tools in a workshop.
What a Protractor Angle Finder Does
A protractor angle finder combines a protractor scale with a pivoting arm or blade. The fixed side rests against one surface, while the moving side follows another surface. The reading shows the angle formed where both sides meet.
Some models use printed degree markings, while others use a dial, pointer, or digital display. Manual versions need careful eye alignment. Digital versions are faster, though they still need correct placement and a flat reference surface.
The tool is useful for checking corners, setting saw angles, marking bevel cuts, laying out slopes, and measuring irregular shapes. It is especially helpful when the angle is not a clean 45 degrees or 90 degrees.
Key Parts of the Tool
- Fixed base or stock: The straight edge that rests against the reference side.
- Pivoting arm or blade: The movable edge that lines up with the second surface.
- Degree scale: The numbered arc that shows the measured angle.
- Pointer or index mark: The small indicator used to read the exact degree.
- Locking knob: The screw or clamp that holds the arm in position after measuring.
- Digital screen: On electronic models, this displays the angle directly.
Setting the Tool Before Reading
Before measuring, check that the protractor angle finder moves smoothly and closes fully. If the arm is loose, bent, or blocked by dust, the reading may shift. Wipe the edges and make sure the pivot holds steady.
Place the tool on a flat surface and close it to zero if the design allows it. Manual tools should show a clear zero position. Digital models often include a zero button that resets the display before measuring.
For best results, keep the base pressed firmly against the reference edge. Do not tilt the tool upward or let it ride on a rough spot. Even a small gap under the base can make the angle reading inaccurate.
How to Position the Angle Finder
Start by choosing the reference side of the angle. This is the side that stays steady while the moving arm adjusts. On a wall corner, for example, one wall becomes the reference and the other wall guides the arm.
Press the fixed base against the first surface with even pressure. Then swing the movable arm until it lies flat against the second surface. Both edges should touch fully, without rocking, bending, or resting on debris.
Once the arm matches the angle, tighten the locking knob if your tool has one. This keeps the measurement from moving while you read the scale or transfer the angle to wood, metal, tile, or another surface.
Basic Reading Steps
1. Place the fixed edge against the reference side.
2. Move the arm until it matches the second side.
3. Hold both tool edges flat and steady.
4. Look straight at the scale or display.
5. Read the number where the pointer lines up.
6. Lock the arm before moving the tool.
7. Recheck the reading if the angle is critical.
Reading a Manual Protractor Scale
A manual protractor angle finder usually has a curved scale marked from 0 to 180 degrees. The pointer or blade edge crosses the scale, and the number at that crossing point gives the measured angle.
Look at the scale straight on, not from the side. Viewing from an angle can create parallax error, where the pointer appears to line up with the wrong number. This is common on smaller tools with close markings.
If the pointer falls between two marks, estimate the value based on the spacing. For example, if it sits halfway between 37 and 38 degrees, the reading is about 37.5 degrees, depending on the tool’s precision.
Reading Inside and Outside Angles
Inside angles are measured between two surfaces that meet inward, such as the inside corner of a room. Place the tool inside the corner, open the arm until both sides touch, then read the scale without changing the position.
Outside angles are measured around an outer corner, such as the edge of a cabinet or trim return. The placement is similar, but the tool sits around the outside of the surfaces instead of inside the joint.
Some angle finders show the direct angle, while others may show the supplementary angle. If a corner appears near 90 degrees but the scale reads near 270 degrees on a digital tool, switch the mode or calculate the needed value.
Common Angle Conversions
- A square corner usually reads 90 degrees.
- A straight line reads 180 degrees.
- A common miter cut for a square frame uses 45 degrees per piece.
- A 60-degree corner often needs 30-degree miter cuts.
- A 120-degree included angle may use 60-degree cuts on each piece.
- Crown molding may require both miter and bevel readings.
Using the Reading for Saw Cuts
When using an angle finder for saw cuts, the measured angle is not always the saw setting. For a miter joint, the angle is often divided by two because two cut pieces meet to create the full corner.
For example, if an inside corner measures 92 degrees, each miter cut is usually 46 degrees. This allows both pieces to meet evenly. A miter saw angle finder guide can help when working with trim, baseboards, or picture frames.
Always test on scrap material before cutting finished stock. Walls, cabinets, and framing are rarely perfect. A small test cut confirms whether the measured angle works with the saw, blade thickness, and material position.
Reading a Digital Angle Finder
Digital angle finders show the angle on a screen, which removes much of the guesswork from manual scales. Open the arms against the surfaces, hold them steady, and read the displayed number after it stops changing.
Many digital models include absolute and relative measurement modes. Absolute mode reads from a built-in reference, while relative mode starts from a user-set zero. Check the mode before trusting the number for layout or cutting.
If the reading drifts, place the tool on a known flat surface and reset it. Weak batteries, vibration, or uneven contact can affect the display. A quick calibration check saves time before accurate finish work.
Manual Versus Digital Readings
Manual angle finders are simple, durable, and do not need batteries. They work well for rough layout, school use, framing, and basic workshop tasks. Their accuracy depends heavily on scale quality and how carefully the user reads it.
Digital angle finders are easier to read and often show decimals. They are helpful for finish carpentry, cabinet work, metal fabrication, and repeatable setups. They still need proper contact and a stable reference surface.
Neither type fixes poor technique. The most accurate tool can still give a poor reading if it is tilted, placed on a damaged edge, or read before the arm is fully aligned with the surface.
Accuracy Tips for Cleaner Results
Keep the tool clean, especially along the measuring edges. Dust, saw chips, dried glue, or paint buildup can lift the base slightly. That small lift changes the relationship between surfaces and affects the final reading.
Use firm pressure, but do not force the tool into the corner. Forcing the arm can flex thinner blades or shift the pivot. Let the tool sit naturally against both surfaces while maintaining steady contact.
Read the angle more than once when precision matters. Remove the tool, place it again, and compare the second reading. If the numbers match closely, the measurement is likely dependable enough for cutting or marking.
Mistakes That Cause Wrong Readings
One common mistake is reading the wrong side of the protractor scale. Many manual tools have two number rows moving in opposite directions. Use the row that starts from the fixed reference side you are measuring from.
Another error is measuring a rounded, painted, or damaged edge. The tool may touch the high point instead of the true surface. When possible, measure from clean, straight, flat sections of the material.
A third mistake is forgetting to divide the angle for miter cuts. Measuring a corner gives the included angle. The saw setting often needs half that value, especially when two matching pieces form the final joint.
Practical Workshop Uses
In woodworking, a protractor angle finder helps set bevels, miters, chair rails, stair parts, and angled joinery. It is useful whenever a plan calls for a precise angle or a real-world corner is not perfectly square.
In home improvement, the tool helps with baseboards, crown molding, tile layout, shelving, and wall-mounted fixtures. Older homes often have corners that vary by several degrees, so measuring first prevents visible gaps.
In metalwork and fabrication, angle finders help check bends, brackets, frames, and layout lines. A reliable reading supports cleaner weld fit-up, better drilling positions, and fewer adjustments after parts are cut.
When to Recheck the Angle
Recheck the angle when the surface is uneven, flexible, or hard to reach. Long trim boards, warped lumber, textured walls, and hand-cut materials can all produce slightly different readings from one location to another.
Also recheck after locking the tool. Some knobs pull the arm slightly as they tighten, especially on cheaper models. Hold the arm in position while tightening, then confirm the pointer or display has not moved.
Rechecking is especially important before cutting expensive material. Hardwood boards, finished trim, tile, and metal stock are costly to replace. A second reading takes seconds and can prevent a poor fit.
Quick Reference for Better Measuring
- Use the cleanest, flattest section of the surface.
- Keep the fixed base fully seated.
- Align the moving arm without forcing it.
- Read manual scales straight on.
- Confirm whether the number is inside or outside angle.
- Divide the included angle by two for many miter joints.
- Test critical cuts on scrap before cutting finished material.
Choosing the Right Angle Finder
Choose a manual protractor angle finder if you need a simple, affordable tool for basic measuring and layout. Look for clear markings, a smooth pivot, and a strong locking knob that holds without slipping.
Choose a digital model if you often measure tricky corners or transfer settings to saws. A bright display, zero function, hold button, and strong arms make the tool easier to use during detailed work.
For woodworking and home repair, a compact angle finder is usually enough. For larger panels, framing, or fabrication, longer arms can improve contact and reduce error across wider surfaces.
Conclusion
Reading a protractor angle finder comes down to clean placement, steady alignment, and careful scale reading. The fixed base follows one side, the movable arm follows the other, and the pointer or display gives the angle.
Manual tools require close attention to the correct scale, while digital tools require proper zeroing and mode selection. Both types work well when the edges sit flat and the user checks the reading before cutting.
If you have wondered how do you read a protractor angle finder, the answer is simple in practice: align both sides fully, read straight from the indicator, confirm the angle type, and test important cuts before final work.
FAQ
What is a protractor angle finder used for
A protractor angle finder is used to measure angles between two surfaces, edges, or lines. It helps with woodworking, trim fitting, metal layout, tile work, school geometry, and any task that needs a measured angle before marking or cutting.
How do I read a manual angle finder?
Place the fixed side against one surface and move the arm against the second surface. Look straight at the scale and read the number where the pointer lines up. Use the correct number row for your measuring direction.
Why does my angle finder show the wrong angle?
Wrong readings usually come from poor contact, tilted placement, dirt under the tool, loose pivots, or reading the wrong scale. Digital models may also need zeroing or fresh batteries before they give a stable measurement.
Do I divide the angle for miter cuts?
For many miter joints, yes. If two pieces meet to form one corner, divide the measured included angle by two. A 90-degree corner usually needs two 45-degree cuts, though real corners should still be checked.
Is a digital angle finder more accurate?
A digital angle finder is easier to read and may show decimal values, but accuracy still depends on placement. Manual and digital tools can both be reliable when held flat, aligned carefully, and checked against a known reference.
0 Comments