
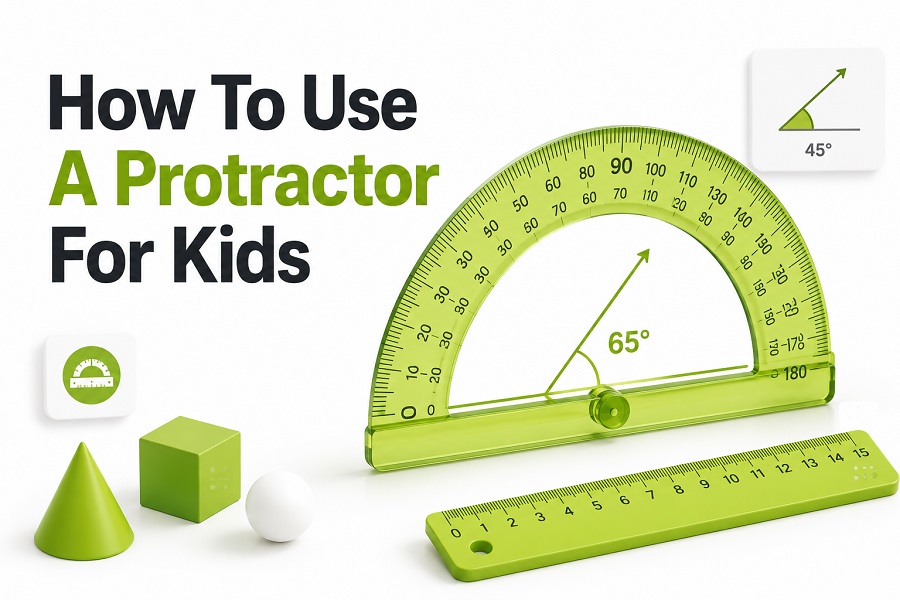
Learning how to use a protractor for kids becomes easier when the tool feels simple instead of confusing. A protractor helps children measure angles, draw angles, and see how lines turn from one direction to another.
Most protractors look like half circles with numbers around the curved edge. Kids may notice two number scales, which can feel tricky at first. The key is learning which scale starts at zero on the side of the angle.
A good lesson should begin with real objects, not only worksheets. Corners of books, open scissors, clock hands, and door openings all show angles. Once children connect angles to daily life, the protractor feels more useful.
What a Protractor Does
A protractor measures the size of an angle in degrees. Degrees tell how wide or narrow an opening is between two lines. A small opening has fewer degrees, while a wide opening has more degrees.
Kids often think the length of the lines changes the angle, but it does not. The angle depends on the turn between the lines. Short lines and long lines can create the same angle if they open the same amount.
A protractor also helps children draw angles correctly. If a child needs to draw 60 degrees, the tool gives a clear guide. This makes geometry more exact and helps children build confidence with math tools.
Quick Practice Checklist
Place the center mark on the angle point.
Line up one ray with the zero line.
Start reading from the zero that touches the ray.
Follow the correct number scale around the curve.
Read the degree mark where the second ray crosses.
Write the answer with the degree symbol.
Check if the angle looks acute, right, obtuse, or straight.
Parts of a Protractor
The center mark is the small point or hole near the straight edge. This part sits directly on the vertex of the angle. If the center mark is not placed correctly, the measurement will usually be wrong.
The baseline is the straight edge of the protractor. Children line one side of the angle along this edge. The baseline helps the protractor stay steady and gives the child a clear starting place.
The curved edge has degree numbers printed around it. Many protractors show numbers going both ways. One scale starts at zero on the left, and the other starts at zero on the right.
Setting Up the Angle
Before measuring, kids should find the vertex. The vertex is the corner point where two lines meet. A protractor measures the opening from this point, so placing the center mark there is the first important step.
Next, one side of the angle should sit along the baseline. It does not matter if the line is short. If needed, children can lightly extend the line with a ruler so it reaches the number scale.
Once the protractor is lined up, kids should hold it still with one hand. Sliding even a little can change the reading. A steady setup makes the rest of the measuring process much simpler.
Choosing the Right Scale
The two number scales are one of the biggest challenges for children. The best rule is to start at zero. Kids should look at the ray on the baseline and choose the scale that begins with zero there.
If the baseline ray points right, the child usually reads the inner scale from right to left. If the baseline ray points left, the child usually reads the outer scale from left to right.
Children can check their answer by thinking about the angle type. If the angle looks small, the answer should be less than 90 degrees. If it looks wide, the answer should be more than 90 degrees.
Common Angle Types
An acute angle is smaller than 90 degrees. It looks narrow, like a slightly open pair of scissors. Children can remember that acute angles are sharp-looking because the opening is small.
A right angle measures exactly 90 degrees. It looks like the corner of a square, a book, or a piece of paper. Many classrooms use an L shape to help kids recognize right angles quickly.
An obtuse angle is greater than 90 degrees but less than 180 degrees. It looks wider than a right angle. A straight angle measures 180 degrees and forms a straight line from one side to the other.
Measuring an Angle Step by Step
First, place the center mark of the protractor on the vertex. The vertex should stay directly under the center point. This helps the curved numbers measure from the correct starting location.
Second, line up one ray with the zero line. The ray should sit along the straight edge of the protractor. If the ray does not reach the numbers, extend it gently using a pencil and ruler.
Third, read the number where the other ray crosses the curved scale. Start from the correct zero, then move around the scale until the second ray meets a degree mark. That number is the angle measurement.
Drawing an Angle Step by Step
To draw an angle, kids should begin with one straight ray. A ruler helps keep the line neat. This first ray becomes the baseline, and its starting point becomes the vertex.
Next, place the protractor center mark on the vertex. Line the baseline ray with zero. Find the number for the angle, then make a small pencil mark at that degree on the curved edge.
Finally, remove the protractor and use a ruler to draw a second ray from the vertex through the pencil mark. The opening between the two rays is the angle the child has drawn.
Helpful Classroom Examples
Clock hands are excellent for angle practice. At three o’clock, the hands form a right angle. At six o’clock, they form a straight angle. Children can move paper clock hands to create many angle sizes.
Door openings also show angles clearly. A slightly open door creates an acute angle, while a wider door may create an obtuse angle. These examples help children see that angles appear outside worksheets.
For more practice, use angle measurement worksheets on our site after hands-on activities. Worksheets work better when children already know how to place the protractor and choose the correct scale.
Mistakes Kids Often Make
One common mistake is placing the center mark away from the vertex. Even if the baseline looks close, the answer can be wrong. The center point and vertex need to match before reading the number.
Another mistake is reading the wrong scale. A child may choose 130 degrees when the angle is really 50 degrees. Asking whether the angle looks acute or obtuse helps catch this problem.
Kids may also measure from the end of a line instead of the corner. Remind them that a protractor measures the turn at the vertex, not the length of the rays or the space around them.
Ways to Make Practice Easier
Start with large printed angles before moving to small textbook diagrams. Bigger angles are easier to align with the protractor. This helps children focus on the steps instead of struggling with tiny lines.
Use a transparent protractor when possible. Clear plastic lets children see the angle underneath the tool. This makes it easier to place the center mark and keep the baseline lined up.
Short practice sessions work better than long drills. Five careful angles can teach more than twenty rushed problems. Children learn faster when they explain each step aloud while measuring.
Activities for Home Learning
Ask kids to find angles around the house. They can look at picture frames, table corners, open books, and folded paper. Measuring real objects makes the lesson feel practical and less like memorizing rules.
Children can also create angle art. They draw several rays from one point, measure each angle, and color the sections. This combines math with creativity while still giving useful protractor practice.
Parents can use our geometry tools for kids guide to support home lessons. Choosing simple tools, clear worksheets, and age-friendly examples makes practice smoother for children who are still building confidence.
Teaching Tips for Parents and Teachers
Use the same words each time: vertex, baseline, zero, scale, and degrees. Repeated language helps children remember the process. Changing terms too often can make the steps feel harder than they are.
Model the process slowly before asking children to try alone. Place the tool, line up the ray, choose the zero, and read the scale. Speaking each action clearly helps children copy the routine.
Give feedback on setup before checking the final number. If the protractor is placed correctly, the child is close to success. Most measuring errors come from alignment, not from counting the degree marks.
Building Confidence With Angles
Confidence grows when children can predict the angle type before measuring. Ask whether the angle looks acute, right, obtuse, or straight. Then let the protractor confirm the estimate.
This habit helps children avoid unreasonable answers. If an angle looks narrow but the reading says 140 degrees, they know to check the scale again. Estimating first builds stronger math sense.
Celebrate accuracy and careful setup, not speed. Protractor skills take patience at first. Once children learn the routine, they usually become faster naturally without needing pressure or extra correction.
Conclusion
Learning how to use a protractor for kids works best when the steps are clear, visual, and repeated often. Children need to place the center mark on the vertex, line up the baseline, choose the correct zero, and read the matching scale.
Real-world examples, drawing practice, and short measuring tasks help kids connect angles to daily life. With steady practice, a protractor becomes a useful math tool instead of a confusing classroom object.
FAQ
What age can kids start using a protractor
Many children begin using a protractor around third or fourth grade, depending on their math level. They should already know basic shapes, lines, and corners before learning degree measurement with a classroom protractor.
Why do protractors have two number scales ?
Protractors have two scales so children can measure angles opening from either direction. The correct scale is the one that starts at zero where the baseline ray is placed.
How can kids avoid reading the wrong number ?
Kids should first decide if the angle looks acute or obtuse. Then they should start from the zero aligned with the baseline ray and follow that scale until the second ray crosses.
What is the easiest angle to measure first ?
A right angle is often easiest because it measures exactly 90 degrees and appears in many familiar objects. Book corners, paper corners, and square tiles give children simple examples before harder angles.
Can kids draw angles with a protractor ?
Yes, kids can draw angles by making a baseline ray, placing the protractor on the vertex, marking the needed degree, and drawing a second ray through that mark with a ruler.
0 Comments