
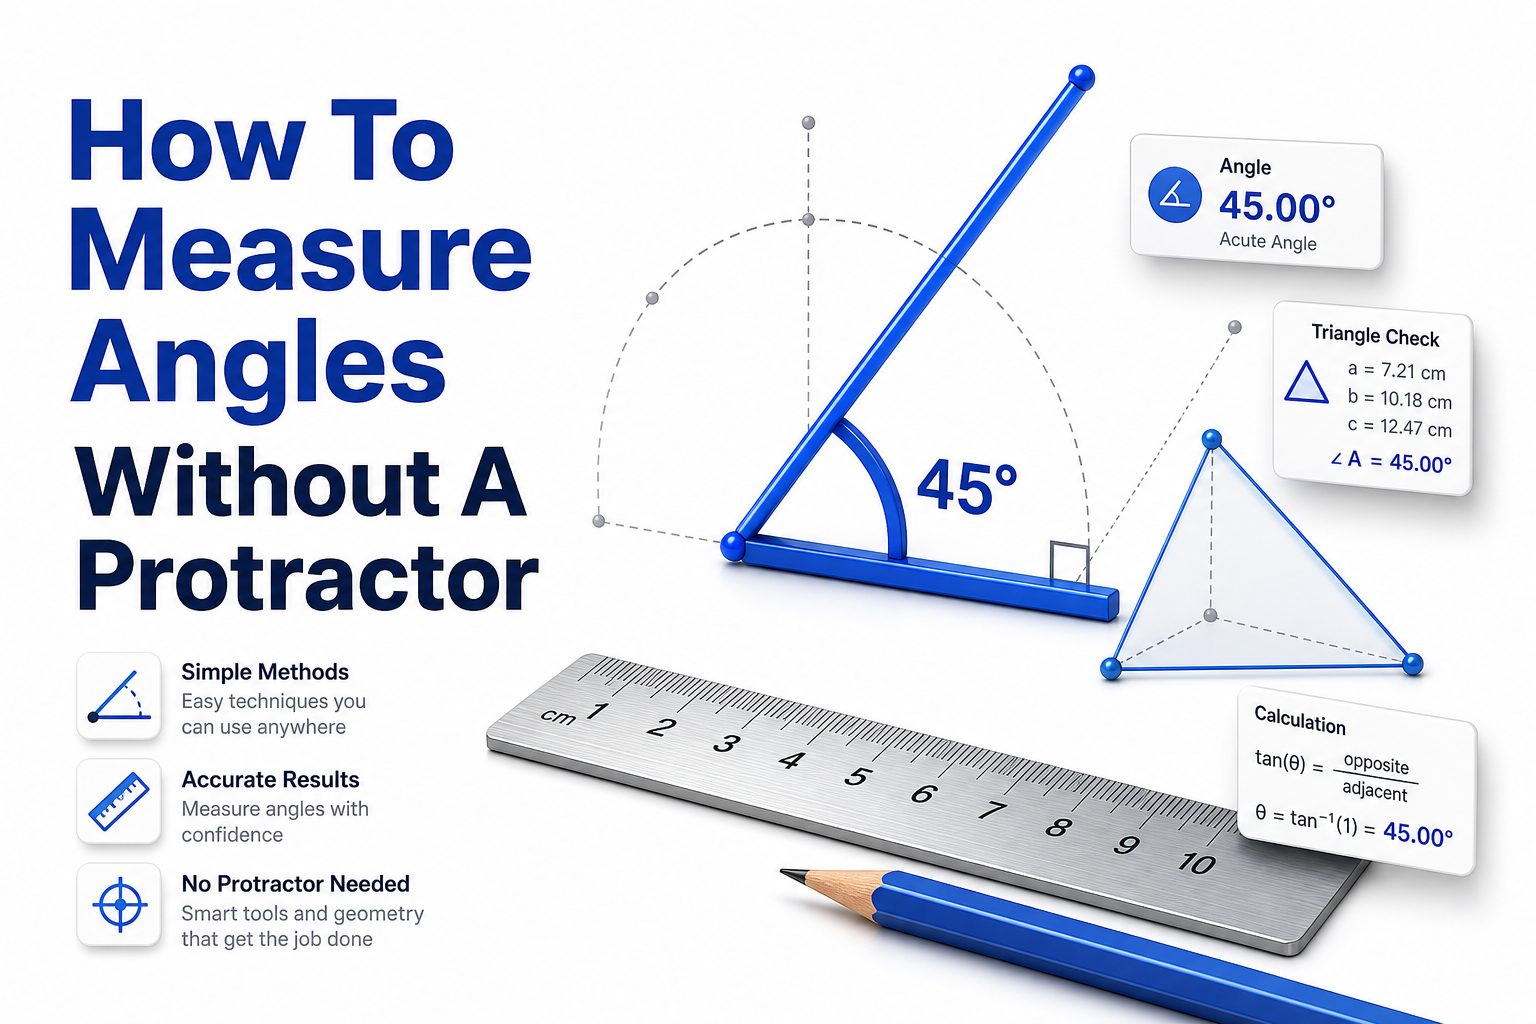
Measuring angles is not limited to using a protractor. In many real situations, you may need a quick estimate or a reasonably accurate result with tools already nearby. Paper, rulers, clocks, and simple geometry can help you measure angles confidently.
The key is to match the method to the level of accuracy you need. A school drawing, furniture layout, craft project, or field sketch may not require the same precision as technical drafting or engineering work.
This guide explains practical ways to measure angles without a protractor. Each method uses common items and simple reasoning, so you can choose the best approach based on your tools, time, and required accuracy.
Why Angle Measurement Matters
Angles appear in everyday tasks more often than many people notice. Hanging shelves, cutting trim, folding paper, drawing diagrams, arranging furniture, and checking corners all depend on angles. A small angle error can change how parts fit together.
Accurate angle measurement also improves visual balance. Designers, artists, builders, and students often rely on angle judgment to create neat layouts and clean shapes. Even a basic estimate can make a project look more intentional.
When a protractor is unavailable, the goal is not always perfect precision. The goal is to use reliable reference points, compare known angles, and apply simple methods that reduce guessing.
Common Reference Angles
Some angles are easy to recognize because they appear in familiar shapes and objects. Learning these references helps you estimate quickly before using a more detailed measuring method.
- 90 degrees: a square corner, book corner, wall corner, or paper corner
- 45 degrees: half of a right angle, often seen in folded square paper
- 60 degrees: an equilateral triangle angle
- 30 degrees: half of a 60-degree angle
- 180 degrees: a straight line
- 360 degrees: a full turn or complete circle
These reference angles are useful because many unknown angles can be compared against them. If an angle is clearly wider than 45 degrees but narrower than 90 degrees, you already have a strong starting range.
Using a Sheet of Paper
A standard sheet of paper is one of the easiest tools for measuring angles without a protractor. Every rectangular sheet has four 90-degree corners, which can be used as reliable angle references.
Place one corner of the paper at the angle’s vertex. Align one edge of the paper with one side of the angle. If the other side matches the paper’s perpendicular edge, the angle is 90 degrees.
You can also fold the paper corner diagonally to create a 45-degree angle. This gives you another reference. Comparing the unknown angle with 45 degrees and 90 degrees helps you estimate many common angles.
Measuring With Folded Paper
Folded paper can create several useful angle guides. Start with a square or rectangular sheet and fold one corner exactly onto the opposite edge. This diagonal fold creates a 45-degree reference from a right angle.
To make a rough 22.5-degree reference, fold the 45-degree angle in half. Accuracy depends on clean folding and careful alignment, but this is often good enough for crafts, sketches, and quick layout checks.
For better results, crease firmly and use the fold as a straight guide. Folded paper works best on flat surfaces where the angle lines are visible and the paper can sit directly over the vertex.
Using a Clock Face
A clock face is a simple angle measuring tool because a complete circle has 360 degrees. Since a clock has 12 hour marks, the distance between each hour mark equals 30 degrees.
To use this method, imagine the angle’s vertex at the center of the clock. Align one side of the angle with 12 o’clock. Then compare the other side with the hour marks to estimate the angle.
For example, the space from 12 to 1 is 30 degrees, from 12 to 2 is 60 degrees, and from 12 to 3 is 90 degrees. This method is helpful for quick visual estimates.
Clock Angle Quick Guide
The clock method is especially useful when the angle is drawn on paper or when you can rotate the object mentally. It gives fast results without calculations or special tools.
- 1 hour mark equals 30 degrees
- 2 hour marks equal 60 degrees
- 3 hour marks equal 90 degrees
- 4 hour marks equal 120 degrees
- 5 hour marks equal 150 degrees
- 6 hour marks equal 180 degrees
If the angle falls between two hour marks, estimate the halfway point. Half of 30 degrees is 15 degrees, so halfway between 1 and 2 hour marks is about 45 degrees from the starting line.
Using a Ruler and Basic Trigonometry
A ruler can help measure angles when you know basic triangle relationships. This method works well when the angle forms or can be turned into a right triangle.
Draw or identify one side of the angle as the base. From a point on the other side, draw a perpendicular line down to the base. You now have a right triangle with a height and a base length.
Measure the height and base with a ruler. The tangent of the angle equals height divided by base. You can then use a calculator to find the angle using the inverse tangent function.
Simple Formula Method
This ruler method is more accurate than visual estimation when done carefully. It is useful for woodworking sketches, layout planning, math homework, and situations where you can draw extra guide lines.
The formula is: angle = arctan(height divided by base). Most phone calculators have a scientific mode with tan inverse, often shown as tan⁻¹ or atan.
For example, if the height is 5 inches and the base is 10 inches, height divided by base equals 0.5. The inverse tangent of 0.5 is about 26.6 degrees.
Using a Right Triangle
A right triangle can act like a basic angle measuring tool. Many drafting triangles, set squares, and school triangles include fixed angles such as 30, 45, 60, and 90 degrees.
If you have a 45-45-90 triangle, you can compare an unknown angle to 45 degrees and 90 degrees. If you have a 30-60-90 triangle, you can compare against 30, 60, and 90 degrees.
Even without a formal drafting triangle, you can create one from paper. A folded square gives a 45-degree triangle, while carefully constructed equilateral triangle folds can help create 60-degree references.
Using a Carpenter’s Square
A carpenter’s square provides a reliable 90-degree reference. It is useful for checking corners, marking cuts, aligning shelves, and measuring whether an angle is wider or narrower than a right angle.
Place the square’s inside corner at the vertex of the angle. Align one arm of the square with one side of the angle. The other arm shows the exact 90-degree reference line.
If the second angle side falls inside the square, the angle is less than 90 degrees. If it falls outside, the angle is greater than 90 degrees. This gives a clear comparison quickly.
Using a Speed Square
A speed square is common in carpentry and home repair. Many speed squares include angle markings, making them a useful substitute for a protractor in practical building tasks.
Place the pivot point of the speed square at the vertex of the angle. Align the square’s edge with one side. Read where the other side crosses the angle scale.
This tool is especially useful for roof pitches, angled cuts, framing, and trim work. For anyone who handles basic DIY projects, a speed square is often more practical than a school protractor.
Using a Compass and Straightedge
A compass and straightedge can help copy, compare, and divide angles. This method does not always give a numerical degree value, but it helps reproduce an angle accurately.
Place the compass point at the angle’s vertex and draw an arc crossing both sides of the angle. Without changing the compass width, draw the same arc from a new point on another line.
Measure the distance between the two arc intersection points on the original angle. Transfer that same distance onto the new arc. Draw a line from the new vertex through the transferred point.
Copying an Angle Accurately
Copying an angle is useful when you need the same angle somewhere else. It is common in drawing, pattern making, craft templates, and layout work where matching matters more than knowing degrees.
This method avoids estimation because the compass preserves distance. If your arcs and transferred marks are clean, the copied angle can be very close to the original.
For more geometry practice, see our angle construction guide. It can help connect measuring, copying, and drawing angles using simple tools.
Using a Smartphone
A smartphone can measure angles through built-in sensors and apps. Many phones include a level tool, and plenty of apps provide inclinometer or angle finder functions.
For sloped surfaces, place the phone edge against the surface and read the angle from the app. This works well for checking ramps, shelves, furniture, camera setups, and basic construction alignment.
Phone readings depend on sensor calibration and case shape. Remove bulky cases when needed, place the phone carefully, and recalibrate the app if the reading seems inconsistent.
Using a Digital Level App
A digital level app is best for measuring tilt rather than angles drawn flat on paper. It can tell whether a surface is level, vertical, or sloped by a certain number of degrees.
To use it, open the app and place the phone on the surface. Wait for the reading to settle. Some apps let you zero the measurement, which helps compare one surface angle against another.
This approach is quick and convenient, but it should not replace professional measuring tools for structural work. It is most useful for household tasks and general layout checking.
Using a Printable Angle Guide
If you do not have a protractor but have access to a printer, a printable angle guide can help. A printed circle with degree marks can work much like a protractor.
Print at 100 percent scale, then check the guide with a ruler to confirm it did not resize. Printer scaling can slightly distort measurements, especially if the file is set to fit the page.
Cut out the guide or place transparent paper over it. Align the angle’s vertex with the center point, then read the degree marking where the second side crosses the scale.
Making Your Own Paper Protractor
You can create a rough paper protractor by drawing a circle and dividing it into equal parts. A clock-style layout gives 30-degree intervals quickly and can be refined with additional marks.
Start by drawing a straight baseline across the circle’s center. Mark the center point. Use folded paper or a compass method to create right angles, 45-degree angles, and other reference lines.
This handmade guide may not be exact, but it helps when precision is moderate. It is useful for classroom activities, craft planning, and early design sketches.
Using Known Shapes
Many common shapes contain predictable angles. Squares and rectangles have 90-degree corners. Equilateral triangles have three 60-degree angles. Right triangles often include 30, 45, or 60 degrees depending on their proportions.
If you can place a known shape over an unknown angle, you can compare the opening. This is useful when measuring drawn angles, checking layouts, or estimating angles during hands-on work.
Objects such as sticky notes, tiles, books, cutting mats, envelopes, and picture frames can become angle references. The more regular the object, the more reliable the comparison.
Angle Clues From Everyday Items
Everyday items are not precision instruments, but they can provide quick and surprisingly useful references. This is helpful when you need an estimate before making a final measurement.
- Book corner: about 90 degrees
- Folded square paper: about 45 degrees
- Pizza slice from six equal pieces: about 60 degrees
- Clock hour spacing: 30 degrees
- Door opened halfway from a wall: about 45 degrees
- Straight edge: 180 degrees
These comparisons work best when the item is cleanly made and not bent, warped, or rounded. Always check the edge quality before trusting it as a reference.
Estimating Angles by Eye
Visual estimation improves with practice. Start by comparing the angle to 90 degrees. Decide whether it is smaller, equal, or larger. Then compare it to 45 degrees or 60 degrees for a closer estimate.
Break the angle into familiar pieces. If an angle looks like half of a right angle, it is near 45 degrees. If it looks two-thirds of a right angle, it is near 60 degrees.
This method is not ideal for exact cuts or formal drawings, but it helps build confidence. It is also useful when you need a fast field estimate before using another method.
Using the Hand Method
Your hand can serve as a rough angle guide, especially outdoors or during quick visual checks. The spread between fingers varies by person, so this method is best for estimates only.
Hold your hand at arm’s length and compare finger spacing with the angle or object. Some people use the thumb and index finger spread as a rough 90-degree guide when fully opened.
Because hand sizes and flexibility differ, calibrate your own hand against known angles first. Compare your finger positions with a right angle, folded paper, or clock face before relying on this method.
Measuring Angles on a Wall or Floor
Walls and floors often provide built-in reference lines. Corners usually form 90 degrees, while tile lines, baseboards, door frames, and window frames can help compare unknown angles nearby.
To measure a wall angle, align one side with a known straight edge or corner. Use paper, a square, or a phone level to compare the other side against a reliable reference.
This approach is helpful for decorating, furniture placement, and checking whether objects sit squarely. For construction accuracy, confirm with a carpenter’s square or digital angle tool.
Measuring Angles for Woodworking
Woodworking often requires repeatable angles. When a protractor is unavailable, a speed square, bevel gauge, or folded template can help transfer and mark angles cleanly.
For matching an existing angle, use a sliding bevel gauge if available. Press it against the angle, lock the blade, then transfer the angle to the workpiece without needing degree numbers.
If you need a common cut, such as 45 degrees, use a square sheet fold, miter box, or speed square. Always test on scrap material before cutting the final piece.
Measuring Angles for Drawing
Artists and designers often measure angles through comparison. Hold a pencil at arm’s length, align it with the subject’s edge, then transfer the same tilt to the drawing surface.
This method helps with perspective, figure drawing, architecture sketches, and still life studies. The goal is visual accuracy rather than numerical measurement, so consistency matters more than degree values.
For geometric drawings, paper folding, ruler triangles, and compass methods are more reliable. For observational drawing, pencil alignment and comparison usually feel faster and more natural.
Using Slope to Find an Angle
Slope can be converted into an angle when you know rise and run. Rise is the vertical change, and run is the horizontal distance. This is common in ramps, roofs, stairs, and landscape grading.
Measure the rise and run with a ruler, tape measure, or level. Divide rise by run, then use inverse tangent on a calculator to get the angle in degrees.
For example, a ramp that rises 2 feet over a horizontal distance of 12 feet has a slope ratio of 2 divided by 12. The angle is about 9.5 degrees.
Using String and a Weight
A string with a small weight creates a plumb line, which shows true vertical. This can help measure angles from vertical or check whether a surface leans.
Tape or hold the string at the top of the object. Let the weight hang freely until it stops moving. The string now gives a vertical reference line.
Compare the leaning edge with the plumb line. You can then use a ruler and triangle method to calculate the angle, or use a paper guide to estimate it.
Using a Level and Tape Measure
A level and tape measure can help find angles on slopes. This is useful for ramps, decks, driveways, shelves, and outdoor surfaces where a protractor would be awkward.
Place the level horizontally from the lower point toward the higher surface. Measure the vertical distance from the raised end of the level down to the surface.
Divide the vertical distance by the level length, then use inverse tangent to find the angle. This gives a practical and fairly accurate angle measurement without a protractor.
Best Method by Situation
The best method depends on what you are measuring. A drawn angle on paper is different from a sloped board, a wall corner, or a roof edge.
- For quick estimates: use paper, clock marks, or visual comparison
- For crafts: use folded paper or known shapes
- For drawing: use pencil alignment or triangle references
- For DIY work: use a speed square, level, or carpenter’s square
- For slopes: use rise, run, and inverse tangent
- For copying angles: use a compass or bevel gauge
Choosing the right method saves time and improves accuracy. You do not need the most technical option for every task, but you should avoid rough guessing when the result affects fit or safety.
Common Mistakes to Avoid
One common mistake is measuring from the wrong point. The vertex is the exact point where the two angle sides meet. If your tool is not aligned with the vertex, the result can shift.
Another mistake is using warped or rounded objects as references. A bent sheet of paper, rounded phone case, or worn book corner can throw off the estimate more than expected.
People also forget to keep tools flat. Paper, rulers, and squares must sit flush against the surface. Gaps, shadows, and tilted tools can make an angle appear larger or smaller.
Tips for Better Accuracy
Use more than one method when accuracy matters. For example, estimate with folded paper first, then confirm with ruler measurements and a calculator. Matching results gives you more confidence.
Mark clean lines with a sharp pencil. Thick lines can create uncertainty, especially on small drawings. The smaller the angle or object, the more line thickness affects the result.
Work on a stable surface with good lighting. Shadows and uneven surfaces make alignment harder. If possible, tape the paper or object in place before measuring or transferring an angle.
Conclusion
Learning how to measure angles without a protractor is useful for schoolwork, crafts, drawing, repairs, and everyday problem solving. Simple tools such as paper, clocks, rulers, squares, phones, and string can provide dependable results when used carefully.
The best method depends on the situation. Folded paper works well for common angles, a clock face helps with quick estimates, and ruler-based trigonometry gives stronger accuracy for measurable triangles and slopes.
With practice, angle measurement becomes less about one special tool and more about reference points, clean alignment, and choosing a method that fits the task. That approach gives practical results in many real situations.
Frequently Asked Questions
Can I measure an angle with paper?
Yes, a sheet of paper can help measure common angles. Its corner gives a 90-degree reference, and folding that corner diagonally creates about 45 degrees. You can compare the unknown angle against these references for a useful estimate.
How accurate is the clock method?
The clock method is good for estimates in 30-degree steps. Each hour mark equals 30 degrees, so it works best for angles near 30, 60, 90, 120, or 150 degrees. Smaller gaps require careful visual judgment.
Can a ruler measure angles?
A ruler can measure angles when you create a right triangle. Measure the height and base, divide height by base, then use inverse tangent on a calculator. This method can be fairly accurate with careful measuring.
What is the easiest method for beginners?
Folded paper is usually the easiest beginner method. It gives clear 90-degree and 45-degree references without calculations. For many school, craft, and drawing tasks, those two reference angles are enough to make a reasonable estimate.
Can a phone replace a protractor?
A phone can help measure tilt and surface angles with a level or inclinometer app. It works well for shelves, slopes, and furniture alignment. For paper drawings, a printed guide or ruler method may be easier.
0 Comments